A few rain forest and fall color scenes from my trip around the Olympic Peninsula yesterday.
Saturday, June 09, 2012
The Hayman Fire - 10 Years Later
The Hayman Fire was Colorado's largest fire in recorded history at over 138,000 acres burned, 133 homes burned to the ground and 6 fatalities. The US Weather Service had declared a "red flag" warning with under 10% humidity and high winds predicted. The county had declared a "burn ban", as well. It was started June 8th by USFS employee, Terry Barton, so she could allegedly appear a hero by saving the forest. She started the fire in a fire circle near Lake George and it jumped the ring in the high winds and quickly spread eastward. The fire was contained July 2 and finally brought under control July 18th.
At the time, I was freelancing for the local weekly paper, the Ute Pass Courier, and was able to take time off from my day job to cover the fire suppression activity. As we returned from church Sunday morning, the 8th, we saw the initial plume of smoke way out west and headed out there to get pictures.
In remembrance of the fire, I'd like to offer the following photo essay. All images are © Kenneth Wyatt. Permission for reuse may be obtained by emailing wyattphoto@mac.com.
Fire camps were set up near Lake George at the work camp on the south and also on the northern side of the fire. Much of the fire suppression was performed by ground crews, but the fire soon became out of control in the high winds and then helicopters were used to dump water and USAF C-130s were dispatched out of Pueblo Airport to dump slurry.
Public information officer briefing the news crews.
Large flame-up hitting the crown of the trees. This image was taken from near Lake George with a large 500mm lens.
C-130 slurry bomber north of Woodland Park.
The Horse Creek Cafe & Saloon, just off N. Highway 67, near Deckers.
Fire burning out of control north of Woodland Park.
Part of the helicopter operations near Lake George.
Ground crews north of Woodland Park controlling backfires set earlier to provide a buffer for the oncoming fire.
Backfire north of Woodland Park.
USFS map showing the boundary of the Hayman Fire.
Satellite imagery of the fire.
One of many thank you notes left following the fire.
I've been documenting the gradual recovery of the fire zone each year. Initially, the wildflowers and grasses popped up quickly. At five years, the aspens were about 6-8 feet high. I believe eventually, the dominant ponderosa, fir and spruce forest will primarily be replaced with aspens. It's been very slow-going, and will take a couple generations to re-establish a mature forest again.
Wildflowers blooming near blackened sentinels.
Rehab efforts were undertaken by multiple organizations. Here, Boy Scouts are shown planting thousands of seedlings in the burn area just north of Cheeseman Reservoir.
Erosion damage still occurring four years later.
A slurry of grass seed and water was dropped in many areas of the burn area.
Wildflowers growing in the burn area just north of Woodland Park.
Hope you enjoyed reviewing these images from the Hayman Fire and the years succeeding the fire. There are more fire images on my main web site here...
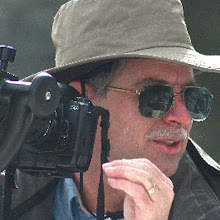
Photojournalist, Kenneth Wyatt, in Nomex protective gear.
Monday, February 13, 2012
Westside Community Center Mural
Fellow nature photographer, Ken Rush, teaches photography at the Westside Community Center. Rush proposed painting a large mural along one of their walls and started with a panoramic image of Garden of the Gods. Wondering how he planned to take the digital image file and turn it into a mural has now been answered! By projecting the image in sections using an LCD projector, he and his students were able to copy the major features and duplicate the color and tone onto the wall of the center, as shown above.
By clicking on the linked title above, you'll be able to see a time-lapse video of the painting!
Wednesday, January 18, 2012
Photographing Reflected Light
Photography is all about light and SEEING the light. The ability to notice unusual lighting and have the ability to capture it compositionally, separates the snapshooters from the true photographers. Rarely, is it possible to make a photograph in mid-day bright sun, as the light causes subject matter to end up too contrasty. Try squinting your eyes while looking at potential subjects under bright sun and you can simulate what your picture will look like - nothing but patchy darks and highlights. That's why most successful landscape photographers shoot in the early morning or late afternoon when the sun is low in the sky. Back in November, I explained why photographing forests in overcast weather is much preferred than with direct sun. This time, let's cover capturing reflected light. This is especially useful when photographing the desert landscape. This is also a great technique when photographing the sandstone formations in Garden of the Gods, and I'll show you some examples. Primarily, I'm looking for areas where the sun's light is reflected back on the rocks.
Here's a classic example where the North Gateway wall was reflecting onto the South Gateway wall near the petroglyph area. Because this was photographed in April, the trees were leafless and provided a nice graphic design. This occurred just after sunrise and is one of my favorite images of 2011.
One of my earliest instructors and colleagues, Weldon Lee, told us, "whenever you see water, think REFLECTION" and I've taken this to heart. I'm normally photographing early in the morning or late in the afternoon, when the sun is low in the sky. During our annual "Eagles & Ice" tour, we generally find ourselves along the South Platte River as it rushes along the canyon. Very often, sunlight will strike the sandstone cliffs and reflect into the water, as in the following images.
Because the image above was photographed in the shade, the snow casts a bluish tint, contrasting well with the golden reflection in the water. I tried to frame the water with the snowbanks.
Here's another example showing the contrast between the blue ice and golden reflection in the water as it races along in ever-downward cascades. I used a slow shutter speed (1/8-sec) to show motion in the water.
Taken in the shade, but reflecting the cool shadowed light from the canyon walls, this patch of ice crystals was taken with a 100mm macro lens from a distance of 12 inches. The crystals are very delicate and about an inch long.
Moving now to the area near Crystal, Colorado, we found ourselves deep within an aspen forest well after sunset. The faint glow in the sky was all it took to backlight this grove. Some of my very best landscapes have been taken well before sunrise or well after sunset. The digital imagers on today's DSLRs are very sensitive and tend to pick up colors better than the human eye can capture.
Here's another image taken at the Crystal Mill/Pumphouse. It was a late fall afternoon and after walking down the hillside to the Crystal River, I noticed that by getting down low to the ground, I was able to capture an astounding reflection of the fall colors in the river. I used a 1/4-second shutter speed to turn the water a bit "cottony", which smoothed the reflections. The camera was mounted just 18 inches from the ground with the closest boulders about a foot away. Amazingly, if one was to stand up along the river bank, the reflection would disappear.
Finally, moving now to the west coast of Oregon at Indian Beach, we arrived just in time for sunset. In surveying the area, I noticed a very shallow portion of the beach where a small creek was running into the ocean. I knew this would afford a large reflecting surface and I carefully aligned the framing so the rocky cliff and creek ended right at the corners. By the time the sky lit up, I was ready to capture the event.
I hope these examples have given you the desire to consider adding reflected light to your photographic repertoire. Always keep an eye out for these sometimes subtle - and many times, intimate - landscapes!
Saturday, December 24, 2011
Merry Christmas!
Merry Christmas! - As I sit quietly watching the glow of the video monitor, I'm reminded once again just how fortunate we all are. Our lives are blessed with so many gifts––the richness of the creative process, the support and enthusiasm of creative people like you, and the love of family and friends. The opportunity to pass along knowledge and share beauty is a great reward to my soul. As we pass from this year to the next, my hope is that you, too, are finding new ways to share your gifts and talents with those in need.
Sheila and I have enjoyed sharing our travels and imagery with you this year and your comments have been a welcome companion along the lonely roads of the west. We both wish you all the very best 2012 has to offer!
For those wishing to sign up for the 2012 Pictures of the Day, click here...
Friday, December 09, 2011
Photographing the Total Lunar Eclipse - Dec. 10, 2011
Lunar eclipses occur several times per year, but total eclipses are a little more rare. We have a chance in the Western US (plus Alaska, Hawaii, and much of Asia) to see it in totality right near sunrise tomorrow. The image above was taken a year ago near Colorado Springs and is composed of a series of individual shots composited together using Photoshop. A 300mm lens with 1.4X teleconverter was used.
There are a number of good resources to predict the timing of eclipses which will help you plan your photographic strategy.
For example, it's generally a good idea to plan on some sort of foreground to make your shots more interesting to the viewer. This can be rock formations or mountain peaks. In the case of the Colorado Springs area, we have the Garden of the Gods rock formations and Pikes Peak - both worthy foreground subjects. Below, you'll see an example taken last year during the totality. The rock was light-painted by a strong flashlight during the 30-second exposure. This was published in Sky & Telescope Magazine several months ago.
Here's a useful link to more info on the eclipse tomorrow (from the EarthSky blog). To calculate the eclipse timing, we take you to the U.S. Naval Observatory. This will customize the timing for your particular location. For Colorado Springs, we have the following data:
From US Naval Obs (http://www.usno.navy.mil/USNO/astronomical-applications/data-services/lunar-ecl-us)
Total Eclipse of the Moon
COLORADO SPRINGS, COLORADO
o ' o '
W104 48, N38 51
Mountain Standard Time
Moon's
Azimuth Altitude
h m o o
Moonrise 2011 Dec 09 16:03 60.9 ----
Moon enters penumbra 2011 Dec 10 04:31.8 277.5 27.1
Moon enters umbra 2011 Dec 10 05:45.4 287.5 13.6
Moon enters totality 2011 Dec 10 07:05.7 299.0 0.2
Moonset 2011 Dec 10 07:09 299.4 ----
It turns out that totality begins about 7:05 AM Mountain Standard Time, which is very close to sunrise. Here's a handy sunrise/sunset calculator that will help you plan whether to shoot at night or at sunrise (moon over the mountains at sunrise, for example). Be sure to check off "Moonrise/Moonset" and "Civil Twilight", which is the time the sun is 6 degrees below the horizon and when landforms (under clear skies) are clearly distinguished. This would be the time when you usually can start photographing your "sunrise" images.
Making a calendar for Colorado Springs, we get the following data:
Twi: 6:36am
Sunrise: 7:06am
Sunset: 4:37pm
Twi: 5:07pm
Moonrise: 4:54pm
Moonset: 7:09am
Sunrise: 7:06am
Sunset: 4:37pm
Twi: 5:07pm
Moonrise: 4:54pm
Moonset: 7:09am
So, the important info would be the entry into the umbra (main Earth's shadow), which starts at 5:45 AM, the start of totality (7:05 AM), Civil Twilight (6:36 AM) and sunrise (7:06 AM).
If you wanted to photograph some recognizable landforms for viewer interest and a sense of scale, you'll want to be in position and photographing by civil twilight (6:36 AM) and the light from sunrise and any leftover light from the lunar eclipse should be relatively balanced. Note that at totality, the moon will be just above the horizon (for us here in Colorado), so if there are high mountain ranges, or other obstructions, we'll miss totality. There will still be opportunities for a partial eclipse, however.
If you wish to use the Garden of the Gods rock formations or Pikes Peak for your foreground, you'll note that as the moon enters the umbra, it is still 13.6 degrees in elevation, which may (not having measured this just yet) put it just above the mountain range here. Good locations might include the Garden of the Gods Visitor Center parking lot or the overlook off Mesa Road. I believe locating yourself at the main parking lot next to the formations will be too close to include the moon.
Another good bet would be to drive west on Highway 24 to Wilkerson Pass and (using large telephoto lens) photograph the moon before it sets over the Collegiate Range.
Looking forward to seeing your pictures!
Wednesday, November 16, 2011
Photographing Forests
I'm often asked to judge photo contests or to perform portfolio reviews and one of my pet peeves is overly contrasty images. These are usually the easiest to discard, as they hurt my eyes. It's also very difficult to pick out any detail. Usually, the highlights are blown out (no detail) and the shadows are blocked up (no detail). Yuck!
There are ways of modifying the light of the direct sun when photographing smaller subjects, such as wildflowers, and we use diffusing disks quite a lot during our wildflower tours. Forests are a different story, though! You just can't hold up a large enough diffuser to soften the light in a forest scene! Therefore, I always check the weather forecast for cloudy or overcast conditions and plan my shooting schedule accordingly. Clouds make a great diffuser!
As Sheila and I were photographing the various redwood forests in Northern California, the light conditions changed from day to day. Some days were cloudless and some were a perfect overcast. It seems I always need to prove to myself that - by golly - you just can't capture a decent forest scenic in sunny weather (as below), so most of the shots taken this day were discarded. This first shot was photographed with full sun and I tried my best to shoot only in the shade most of the time, but this is often what I'm presented with for review by novice shooters.
Redwood forest scene shot in full sun.
This first shot had a lot more contrast prior to adjusting in Lightroom. I toned down the Exposure and brought up Fill Light, which evened things out quite a bit. But there are still bright highlights, which tend to pull the eye away from the central subject matter. It's OK, but not great.
Redwood forest scene shot in overcast skies.
While it's difficult to find a comparable scene when we're traveling from park to park, this one is fairly typical. There are no bright highlights and the tonal value of the scene as a whole is a lot more consistent. Much easier on the eyes!
Image Stabilizing Lenses and Tripods!
Most photographers fail to read the manuals that accompany their newest toys and I admit, I'm one of them. I feel the sign of a quality product is one where you don't have to read how to use it! However, when it comes to image stabilized (vibration reduction) lenses, this can be a major mistake. How many of you realize that most IS/VR lenses require the mode to be turned OFF when tripod-mounted?
Frankly, I have been guilty of this more often than not, and I always wondered why some images were just a bit fuzzy. I always assumed I had jiggled the setup during the exposure. I decided to create an example as I was photographing in Redwoods National Park in Northern California.
I mounted my Canon Rebel T2i body with 24-105mm IS lens on my tripod and photographed a redwood trunk from about eight feet away. I used no filters, and because I was shooting in shade, adjusted the white balance to "Cloudy". I was very careful to avoid shaking the setup during exposure. Then I exposed a shot with IS turned ON and another with IS turned OFF. Once I returned home, I cropped out a small area in order to magnify the surface of the bark. No processing or sharpening has been performed - both images are straight out of the camera. See how much sharper the second image looks? Because digital camera include an infrared (IR) filter which increases blur slightly, it would look even better with a bit of post-process sharpening.
Cropped image as shot with IS turned ON.
Cropped image with IS turned OFF.
Why I Use Polarizing Filters for Vegetation
Most photographers know polarizing filters are useful to reduce reflections - mainly for wet objects, such as boulders in stream shots, or to enhance rainbows or darken skies, allowing clouds to stand out more clearly. Many do not realize they are essential for reducing reflections in vegetation. This came across loud and clear during our trip through the Redwoods National and State Parks in Northern California.
I was shooting in Jedediah Redwoods State Park near the Oregon border and tried shooting the images below with, and without, a polarizer. As you can readily observe, there is a lot of reflection from the ferns and other foliage.
What's also quite interesting is that you don't need full sunlight for the effect to occur. Normally, the greatest polarization effect is 90 degrees from the direction of the sun (as this picture was shot). But in this case, the sky was completely overcast (the best time to photograph forests, by the way). The filter had a very great effect, as you can see! Do you also see that the colors are a deeper, truer, green?
Neither shot was adjusted...these are both straight out of the camera using auto-exposure and aperture priority mode...
Which would you rather hang on your wall?
When purchasing a polarizing filter, be sure to buy one that will fit your largest lens. You can always use reducing rings to fit to smaller diameter ones. You'll also want to be sure to select a circular polarizer, as these will work best for auto-focus cameras.
Be careful when using a polarizer on a wide-angle lens 16-35mm) - especially, the super-wide lenses (10-18mm), as the thicker lens may cause shadowing (vignetting) in the corners of your images. This is primarily an issue for full-frame cameras...not so much with the cameras using the smaller APS-C-sized imagers. The other issue with wide-angle lenses is that the polarizer may cause the tonal value of the sky to vary from left to right. This is why they are usually not recommended for this case. A similar issue presents itself when shooting a series of images to be used in a panoramic. As the angle of the filter changes in relation to the sun, the tonal value of the sky will change, making it near impossible for the panoramic software to fit the pieces together resulting in a consistent tone in the sky.
I was shooting in Jedediah Redwoods State Park near the Oregon border and tried shooting the images below with, and without, a polarizer. As you can readily observe, there is a lot of reflection from the ferns and other foliage.
What's also quite interesting is that you don't need full sunlight for the effect to occur. Normally, the greatest polarization effect is 90 degrees from the direction of the sun (as this picture was shot). But in this case, the sky was completely overcast (the best time to photograph forests, by the way). The filter had a very great effect, as you can see! Do you also see that the colors are a deeper, truer, green?
Neither shot was adjusted...these are both straight out of the camera using auto-exposure and aperture priority mode...
Which would you rather hang on your wall?
Scene without polarizing filter.
Scene with polarizing filter.
When purchasing a polarizing filter, be sure to buy one that will fit your largest lens. You can always use reducing rings to fit to smaller diameter ones. You'll also want to be sure to select a circular polarizer, as these will work best for auto-focus cameras.
Be careful when using a polarizer on a wide-angle lens 16-35mm) - especially, the super-wide lenses (10-18mm), as the thicker lens may cause shadowing (vignetting) in the corners of your images. This is primarily an issue for full-frame cameras...not so much with the cameras using the smaller APS-C-sized imagers. The other issue with wide-angle lenses is that the polarizer may cause the tonal value of the sky to vary from left to right. This is why they are usually not recommended for this case. A similar issue presents itself when shooting a series of images to be used in a panoramic. As the angle of the filter changes in relation to the sun, the tonal value of the sky will change, making it near impossible for the panoramic software to fit the pieces together resulting in a consistent tone in the sky.
Monday, November 07, 2011
Crater Lake, OR
Crater Lake, OR - The last time I visited Crater Lake was when I was in my early teens, so its been on my list for many years. We finally were able to get there to photograph it November 1st during our tour up the West Coast. Its depth of 1,943 feet makes it the 7th deepest lake in the world and deepest in the U.S. Compare this image with the commemorative stamp issued September 5th, 1934. This was part of a series of stamps issued that year from 1 to 10 cent denominations that honored major national parks. Camera settings: Canon Rebel T2i with 24-105mm lens, ISO 400, 1/400 second at f11.
Thursday, July 21, 2011
Ansel Adams on "Creativity"
"I cannot command the creative impulse on demand. I never know precisely what I'll photograph. I go out into the world and hope I will come across something that imperatively interests me. I am addicted to the found object. I have no doubt that I will continue making photographs till my last breath."
I wholeheartedly agree - do you?
Building Your Business
How do you build your business, whether it be photography or anything else?
It's just a matter of "getting your name out there" and marketing your product! Easier said then done, as I continually find out. One of my mentors, John Shaw, once said that when you're in the field shooting, you're spending money, and when you're in the office working, you're making money. I've tried to take that to heart.
Networking is probably more useful in pulling in business than anything. But most people don't understand what networking really means. It's not approaching a group handing out your business cards and going around to everyone saying "buy my product - buy my product". You need to work on establishing relationships with people, learning their needs and offering value to them. I try to freely share things I've learned - even with my competitors. Hopefully, by adding value to the community at large, it will "pay back" eventually. Almost every job I've been offered is one in which I've established a relationship with the buyer.
Then there's that whole social media marketing thing. SMM marketing guru, Kevin Knebl, says that people tend to do business with those they "know, like and trust". While he feels that SMM may be just a momentary fad, he believes strongly that if you simply follow the teachings of Dale Carnegie, in "How to Win Friends & Influence People" (which I'm reading now), you'll outperform the majority of business people in whatever field you're in.
Hope this helps and good luck!
Tuesday, July 19, 2011
Picture of the Day - 7/10/2011
(R-L) (Daughter) Linda & (Husband) Robb Parsons and Robb's cousin, Darin - Just after completing a two-day bike ride called the Double Triple Bypass - a 100+ mile ride over three major mountain passes (each way). The ride started in Evergreen, ending in Avon (just past Vail) the first day. The second day was the reverse. Of course, there was rain and hail both ways. Sheila and I were able to get pictures of both Robb and Linda during the break stations along the route. I'm sure I would have given up halfway up the first pass! Settings: ISO 800, shutter 1/80th second at an aperture of f7.1.
Picture of the Day - 7/9/2011
Baby Mountain Goats, Mt. Evans, CO - Just west of Denver, you'll find the Mt. Evans Highway (CO-103) - the highest paved road in the U.S. climbing to over 14,000 feet in elevation. At the end of this road, herds of mountain goats generally hang out - sometimes right in the main parking lot at the top. They are somewhat habituated to humans, so it's possible to get close-up photos of them without the very large lenses generally used for wildlife photography. We were photographing them for quite a while and near the middle of the day, I saw these two newborns playing on the rocky overhang. I couldn't resist taking several shots. I used my 100-400mm lens (at 400mm) to frame the scene. Settings: ISO 200, shutter 1/1000th second at an aperture of f8.
Subscribe to:
Posts (Atom)